Weekend Wine Room Project
The Weekend Wine Room Project
I am of Scottish descent. That means I have an excuse for being thrifty. In truth, I like to see what I can do with as little as possible. It is more an exercise in creativity than anything, but it has the advantage of making it possible to do more because I (usually) spend less. On this project, I wanted a wine room in one weekend for under $300.
We got a wine room, but we also gained a lot of DIY knowledge. (FYI…self-leveling cement pours quickly and it spreads like wild fire. Be ready or you will be playing a wicked game of Twister.) The best thing about this project is that it was small in scale, but had lots of new learning opportunities. We had never installed trim. Pallet wood was new to us. Can lights were super fun (not really). Acquiring DIY experience is priceless.
We Needed a Wine Room
When we took up making wine as a hobby, what we focused on was the delicious wines we would be making. We would be able to stockpile a great selection. Wine tasting parties would be a snap. What we didn’t really consider was that we would need a place to store all the wine and the equipment. Wine making commenced in Virginia. We had a huge dining room in which we could place our “wine rack” (more on this later) and the kitchen had ample storage for all the equipment.
However, we move. A lot. And not all houses are created equally. In 2013, we bought a house in Texas. There was space for the wine rack in the living room. We stashed the equipment under the bar in the kitchen. When we sold that, we rented a tiny house. There was NO room anywhere. I think I made two batches of wine there and it was just a fight. The carboys took up all the counterspace in the kitchen.
We finally committed to another house and it had a bit of a story. In the 1980s, it had experienced a fire and a pretty hefty renovation as the result. The garage was enclosed to make an office. Loved that. There had been a weird little area that had been part of the garage that had been turned into a storage closet. They had laid linoleum on the sloped concrete and left the once exterior door in place. It adjoined the laundry room/pantry and was very near the kitchen. It was the perfect space for a weekend wine room project.
Cheating in the Wine Room
First of all, let me confess. We had already done some work on the floor and I didn’t count this as part of my wine room budget. I didn’t count it because this floor was replaced when we laid tile in the kitchen, laundry room, pantry, and both storage rooms (one of which would become the wine room).
The wine room floor had been part of the garage and had a sloped floor to keep water out of the house. We had to pour self-leveling concrete on it before we could lay the tile. The threshold was also removed from under the once exterior door so that the floor looked like it belonged inside a house and not some strangely remodeled Frankenstein (which, of course, is what we had bought).
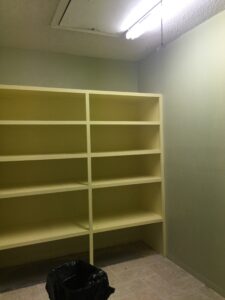 Another cheat. There was a large built-in shelving unit on one end of the room. The shelves were deep and were perfect for the five gallon buckets and carboys, but were too deep for wine bottles. We decided to keep them and figure something out for wine storage. They were a yellow color. We painted them a dark chocolate brown that mimicked the wood tone of our “wine rack”.
And the light in this room was horrendous. We knew that new lighting needed to be installed and that isn’t Jerry’s favorite. Lucky for me, he was a brave soul and decided that installing cans wouldn’t be too terrible.
The Accent Wall
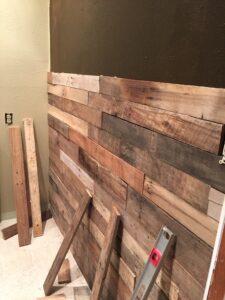 I admit it. The pallet walls look so cool to me and I couldn’t wait to do one. The wine room seemed like a likely place to have some rough looking wood on the wall. I insisted on cheap…I mean, I insisted that the weekend wine room project beinexpensive. We hunted down used pallets and started to disassemble them. Holy smokes! Those things are built to stay together. We probably should have purchased the wood for the wall. However, I don’t know if we would have had all the cool variation. We painted the wall with the same brown paint we had used on the shelving so that any spaces between the wood wouldn’t show.
At the time, we didn’t have an nail gun or any idea of what it takes to hold a board on a wall. We used liquid nails and small nails. That was stupid. Rent a nail gun and just pop those babies into place. I hope nobody tries to remove that accent wall. They will have to tear the house down to get it off. Oops.
Finishing Touches

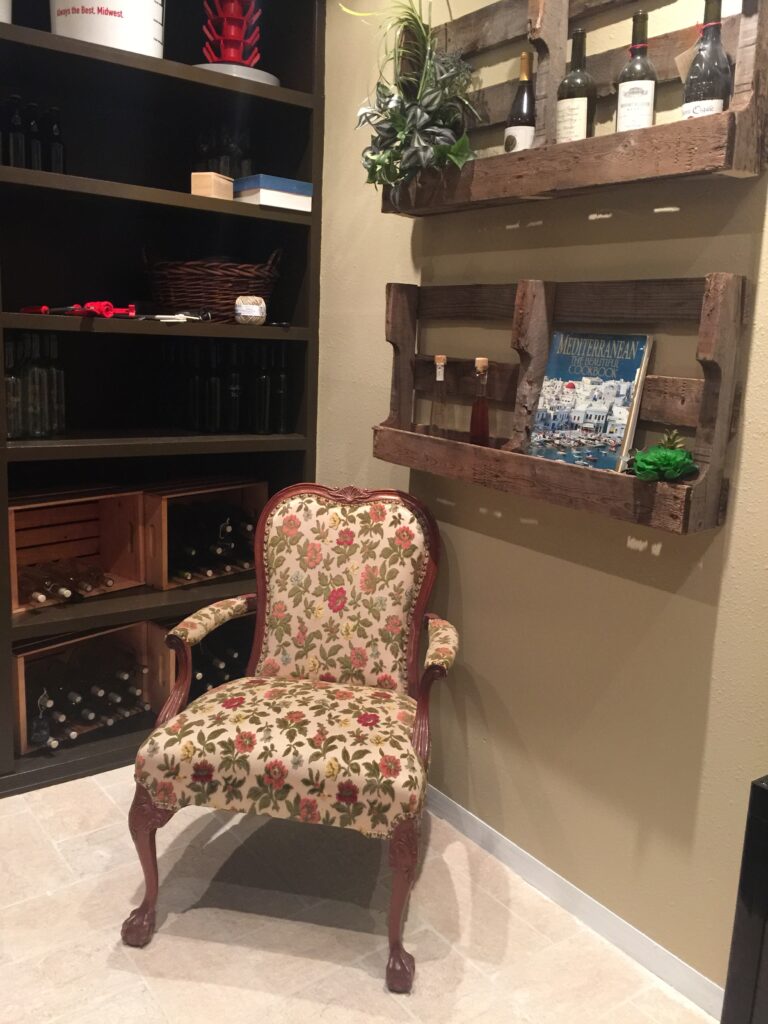
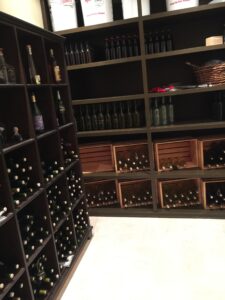 Once the shelves were painted and the accent wall was in place, we got to “finish” the room. That was the best part because, between the textures of the tile floor and the accent wall, we couldn’t do much wrong. The “wine rack” we had was actually an Ikea bookshelf. We like it. We also solved the “too deep” shelves in the pre-existing shelving by staining wooden crates (on sale at Michael’s) and placing them at an angle. This REALLY worked well as it allowed us to separate the wines by variety. One batch of wine fills up two crates or two of the spaces on the wine rack/Ikea bookcase.
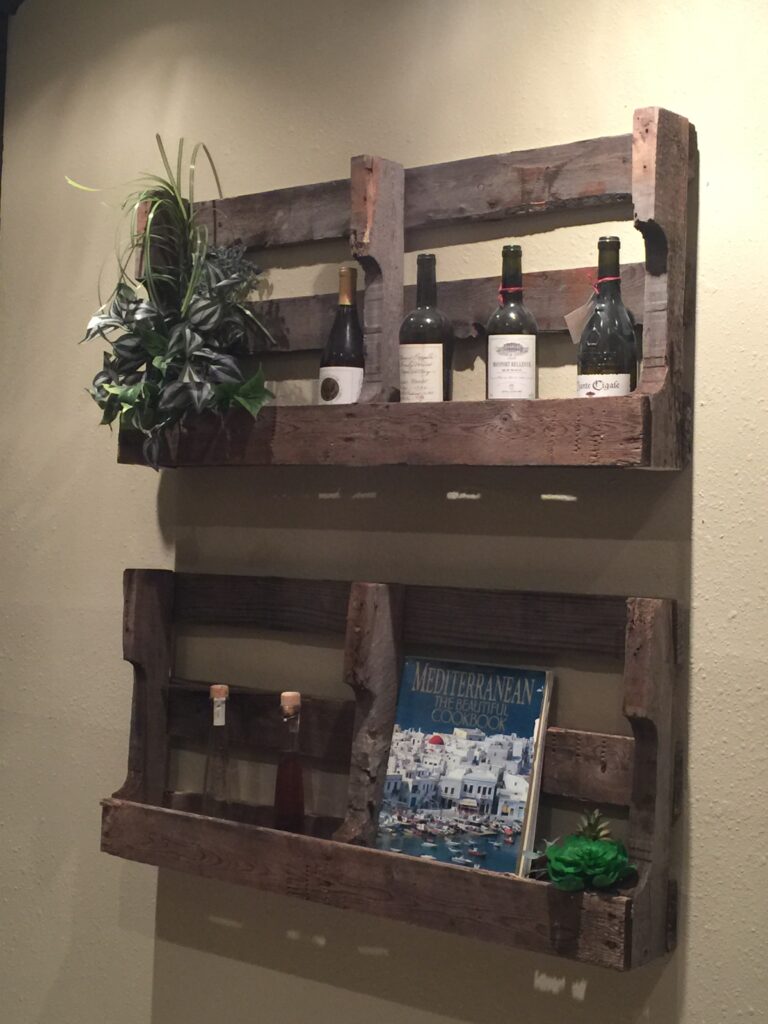 The walls all got a nice neutral beige paint on them so that they looked clean and new. We had a pallet left over and so we cut in in half and mounted it on the wall as a book shelf. It added some storage for books and wine bottles as well as some texture on the wall that had the least interest.
Time and Budget Goals
We had all of our materials gathered before we began and I don’t count that as part of our time line. We started on Friday night and we finished Sunday afternoon. That was a great weekend project! My $300 budget was miraculously undercut! We only spent $267 on the renovation of this room. Mainly because we reused what we had and only purchased the light fixtures, paint, some trim for the shelving unit, the pallets and liquid and regular nails.
You May Also Like