Want DIY Experience? Here’s How To Get It
Welcome to Square One
It is an age-old problem. How do you get DIY experience when you have no experience? First time DIY projects can sort of feel the same way. How do you justify the risk of a first time DIY project? The potential of saving yourself labor costs is a motivating factor certainly. However, DIYers must also examine the likelihood of them successfully completing the project. To fail may mean having to hire a professional to do the job (and repair any damage) along with material costs for a second go around. Successful DIY projects save money and add value to a home, unsuccessful ones can become nightmares.
Is there a way to help avoid these DIY disasters? Maybe.
Learn From Vicarious Experience
We watched TV…a lot of TV, together. Jerry and I sat side by side with the remote in hand and watched DIY shows. Sometimes with a pen and notebook. We watched and paused and discussed. We used the different shows on TV as instructional videos to gain vicarious DIY experience. And we didn’t just watch the pros…we learned a lot from the first timers making huge mistakes so we could avoid them ourselves. Some of our favorite shows are First Time Flippers, Rehab Addict, Good Bones, and Fixer Upper. We learned what not to do from First Time Fippers, and things we did (and didn’t) like from the others. But I want you to know that Jerry and I found our own mistakes to make no matter how much we learned from others.
Get Hands-On Experience
We gained DIY experience whenever we could and that meant that we sometimes practiced at other people’s houses. This sounds like cheating. “We don’t want to ruin our house, but we are happy to ruin yours…” It wasn’t like that. An opportunity presented itself and we took advantage of it.
Our son purchased a starter home. It needed some fixing up. When he was ready to put it on the market, he knew that there were a couple of minor projects that he wanted to tackle. He didn’t have any DIY experience. I did and so I went to work at his house.
 The interior needed a fresh coat of paint. Easy. I had painted before. The entryway had some dated spindles. Easy. We removed them, applied putty, and painted. The kitchen cabinets needed some help. Sanding and paint. I can do that. And then, there was the back splash.
I had never tiled let alone tiled a back splash. I didn’t mention that to him (but of course, he knew this…). After all, I had seen it done several times on TV. And yes, I know this sounds glib. Meh…how difficult can it be? Not very difficult at all. I knew how to use the tile saw. We purchased the mastic and grout pre-mixed. It was a simple project and that was key.
Start With Basic Projects
It is better to gain DIY experience on basic projects first and move on to more challenging projects. The project at our son’s house was a very small project and that is an important point. If I had flubbed the entire thing, I could have afforded to replace all the tile material and start over. John, at that point in his life, probably couldn’t have afforded to buy another set of tiles for the back splash. I assumed this risk because I needed the experience. Having to replace $100 worth of tile was a very, very cheap tiling lesson in my book. Thankfully, the back splash went up without a hitch.
By design or by luck, this wasn’t the last time I would ever tile. My next tiling job was on a much larger scale, with more money and time involved, and it was in our own home. Jerry and I had purchased a very nice, but dated 1970s rancher. It had been updated in the 1980s after a fire had damaged the home. There was old linoleum on the concrete foundation in the kitchen and laundry room. I wanted tile floor. And now I could say that I had tile laying experience, right?
Don’t Make It Harder Than It Should Be
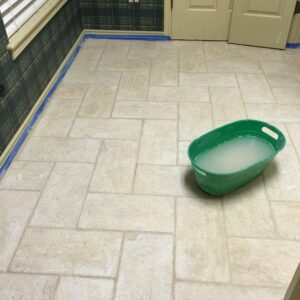
 Jerry’s granny always said “go big or stay home”. I don’t think she was talking about tiling jobs. Yikes. The flooring we decided to tile was all connected. It was the kitchen, laundry room, a small closet, and two storage rooms. The space was about 400 square feet with lots and lots of cuts. It was a nightmare and it took forever. The size of the job made it more difficult. The layout (corners, doorways, closets, and so on) make the job complicated. I went from kindergarten to a Master’s level tile job. Oh…and we decided we wanted to do a herringbone pattern just to up the degree of difficulty.
The floor turned out beautifully. It did take us almost a week to lay the tiles and to grout it. The poor house was stuck in the 1970s and this new floor gave it a clean modern look. This was a huge undertaking and we did gain a lot of DIY experience. But some of these tiling lessons were learned through our mistakes and that’s okay (but painful).
You Will Make Mistakes
 While the tile went down without a hitch, we still had a couple of DIY lessons to learn. They were both painful ones. I was grouting, Jerry was removing the grout. I was over spending time on my bottom on the cold hard floor. My hips were killing me and the grouting was all that stood between my and the couch. No one has ever grouted as quickly as I did.
But grout removal takes more time that the actual grouting. Poor Jerry was falling further behind and he pushed to keep pace. It was no good. And there is sand in that grout and sand is an abrasive. Jerry actually worked his fingers to the bone (not to the bone, but he did wear the skin off) removing the grout.
And that led us to another DIY tiling lesson. If you don’t get the grout off with water while it is still wet, you are in for trouble. We search for methods of removing dried grout. Muriatic acid…that didn’t work. And then we went all in with wire brushes, then screwdrivers and putty knives. Eventually, I busted out the Dremel tool and would work on three tiles at a time. This was a very, very hard lesson, and one we swore we would never repeat.
Share What You Learn
And, in the closing paragraph of this post, I would like to tell you, dear reader, that using a Dremel tool on a ceramic floor is not a good idea. You should only grout a tiny area and COMPLETELY remove all grout before proceeded to the next patch of flooring. Expect to use gallons and gallons of water. You should change out your water frequently.
We did tile again (stories for future posts) and we applied what we learned. Two people on grout removal is better than one. I wipe, Jerry keeps me in fresh water. It is the easiest way to get it all off the tiles without wearing your fingers to the bone.
If only we had seen this on TV…
You May Also Like