The Ugliest Kitchen in the World: How We Turned This Room Around
Good Bones
When we bought this sweet rancher, we thought that it had “good bones”. We loved the backyard and the location was perfect. The house had undergone a fire-induced renovation back in the 1980s, but this little gem was in need of some updating. Updating is a lot easier than making significant structural changes like knocking out walls or building an addition. We weren’t ready to take on anything quiet that large, but we were ready to do a few basic projects in order to move the rooms in the right direction.
In the photo below, we had already updated the linoleum flooring with new tile. That helped a lot. It was one of the largest DIY projects we had taken on scale-wise. It was a lot of square footage to cover and there were so many cuts to make. We had done small tile jobs in the past and the scale of this project helped up to polish our tile-laying skills.
Where to Begin?
We started in the kitchen, laundry room, storage closet. The flooring was the first thing to go and since all the rooms were connected, the flooring was replaced in all those areas at the same time. The storage room was converted into a killer wine room over the course of a weekend. It is probably the best use of $165 ever.
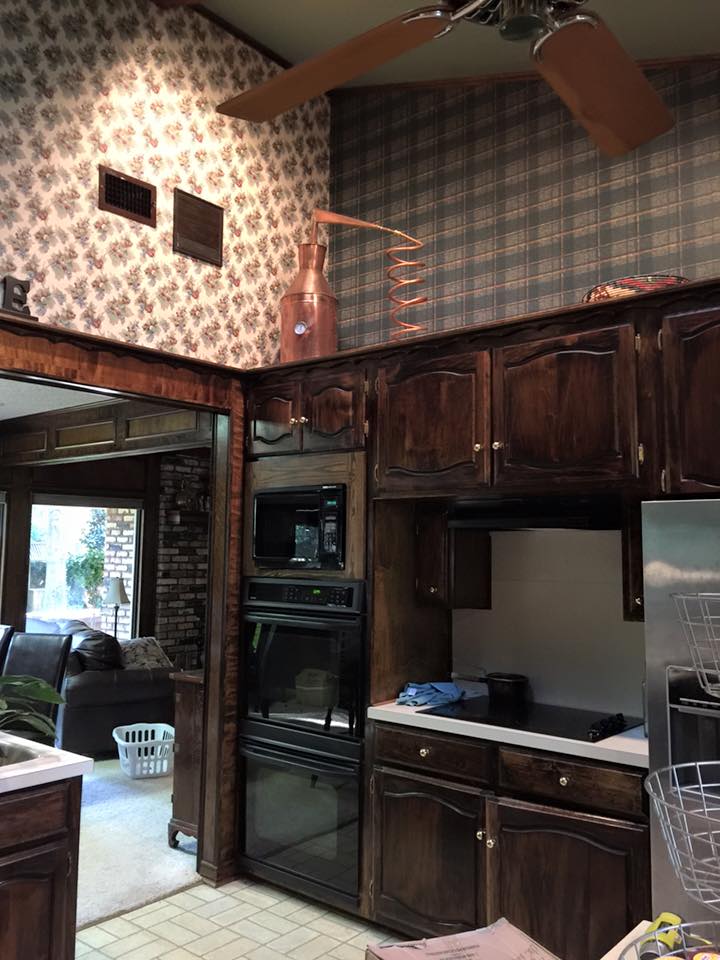
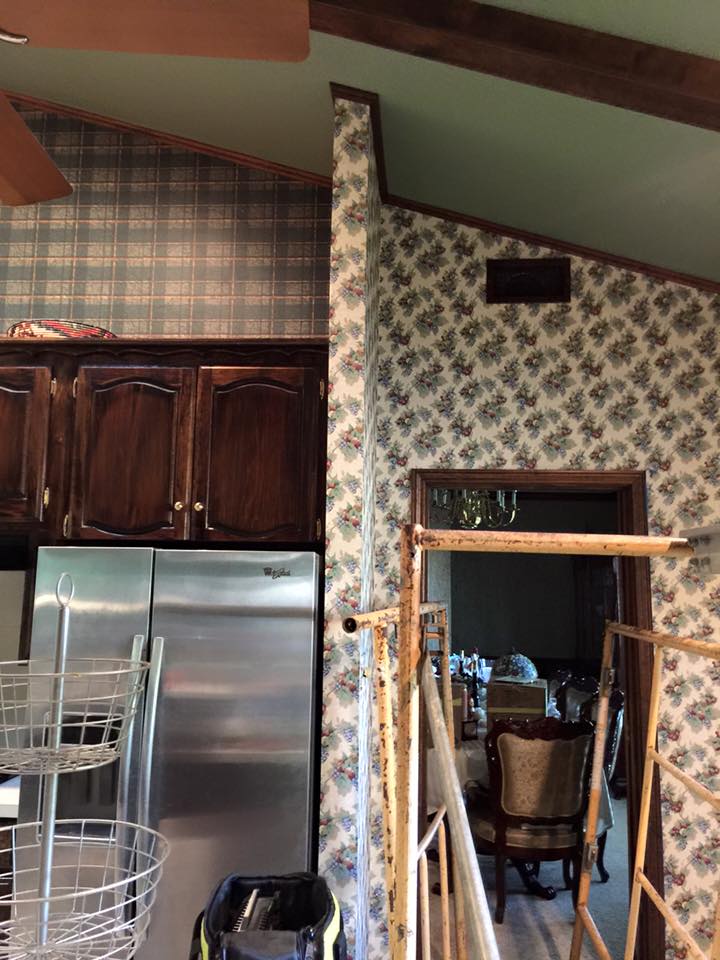
The floor project helped move the ugliest kitchen on earth in a good direction, but only if you continued to look down. Vaulted ceiling. Beams. Skylight. Lots of space, great cabinets and layout. And it was hideous. Truly hideous. I am certain that it was the height of fashion when it was remodeled back in the 80s. However, times change and that amazing 80s wallpaper had to go along with the Formica counter top and the linoleum floor that looked like cream colored bricks. I just couldn’t take it.
Taking on the Kitchen
We rented scaffolding and I began to remove the wall paper. I had removed wall paper before (with varying degrees of success). I remember walking into a friend’s house and she was removing wall paper in her kitchen. She stood scraping wall paper off the wall with her thumbnail the entire time I was there. My mom and I removed wall paper at a house in Georgia. I bought the little scoring tool to poke holes in the paper so the spray solution could penetrate. I pushed down too hard and scored the sheet rock. Oops. And then there was the time that I rented a steamer to remove the paper. What a wet, soggy mess. What did I learn? I’ll tell you…
Your removal technique is going to depend on what type of adhesive was used and what the actual wall paper is made of. This paper was made for a kitchen/bath as it had a fairly heavy vinyl layer with paper underneath. Steam would not have penetrated the vinyl layer nor would any spray on wall paper removers. I peeled the vinyl layer off and that exposed the paper backing. I chose to use a wall paper remover solution and scrape the walls (after I had peeled off as much as I could).
What Goes Up Next?
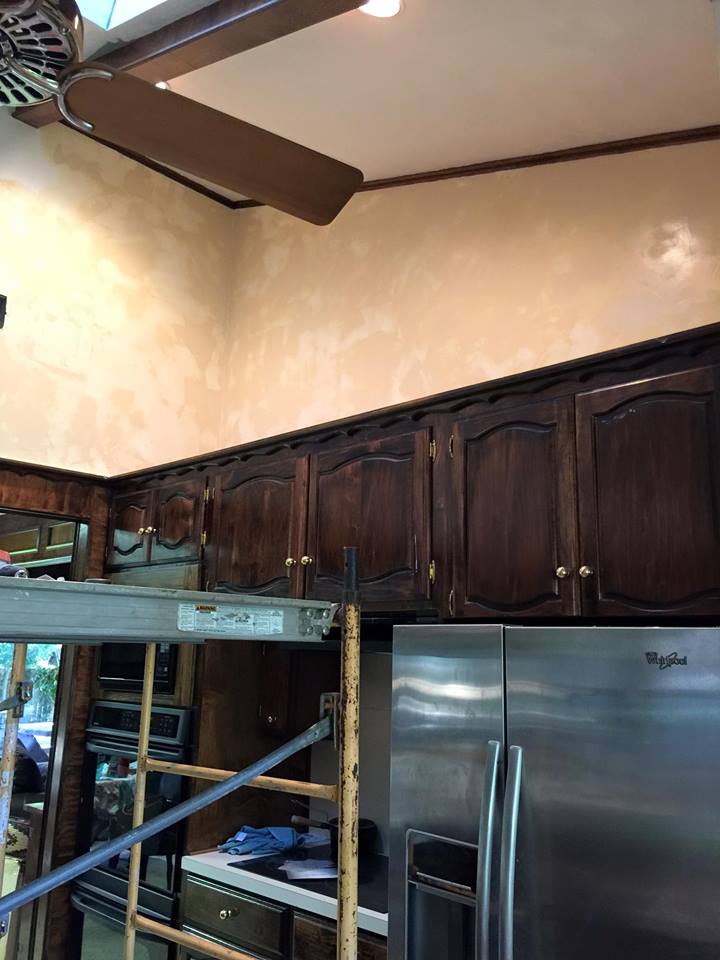
The walls were not textured or ready to receive paint and so we opted for a finish that I absolutely love…Venetian Plaster. The Venetian Plaster product is great for walls with flaws and imperfections as it covers all of that and, you can have it tinted so that when you apply it, you are also changing the wall color instead of having to paint afterward. We selected a nice buttery yellow for our kitchen to highlight the dark wood cabinets.
Here is a peak at the Venetian Plaster finish. In the picture below, it is still drying. Plaster has a splotchy appearance when it is wet that softens as it dries.
The Counter Tops and Back Splash
The counter tops were a cream colored Formica and they were really dated. The Formica didn’t stop on the counter top either. No, it continued as the back splash. In short, it was a whole lotta ugly.
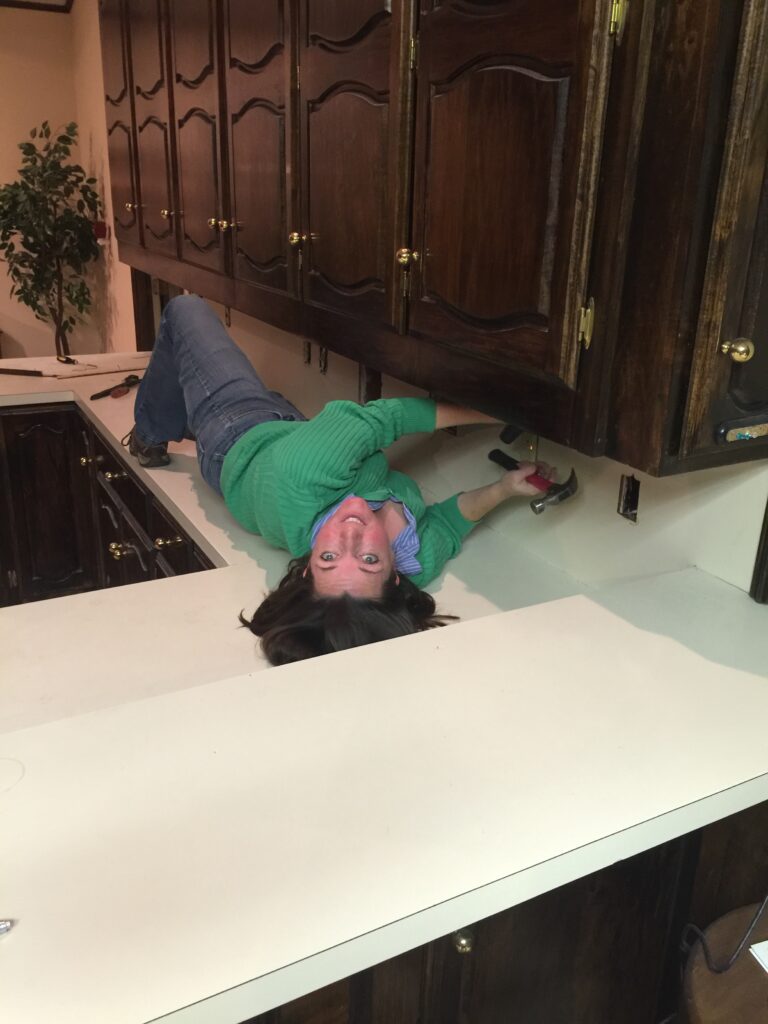
We liked the cabinets and we certainly didn’t want to replace them and so, the counter top and back splash had to be removed with care. We chiseled, chipped, pulled, hammered…Formica is difficult to remove.
An additional word of warning. Formica is as sharp as glass when you start removing it. Be super careful and wear protective gear. Jerry and I both had cuts from the broken edge. And yes, I realize I didn’t have on any protective gear in the photo (left). Please be smarter (and safer) than I was!
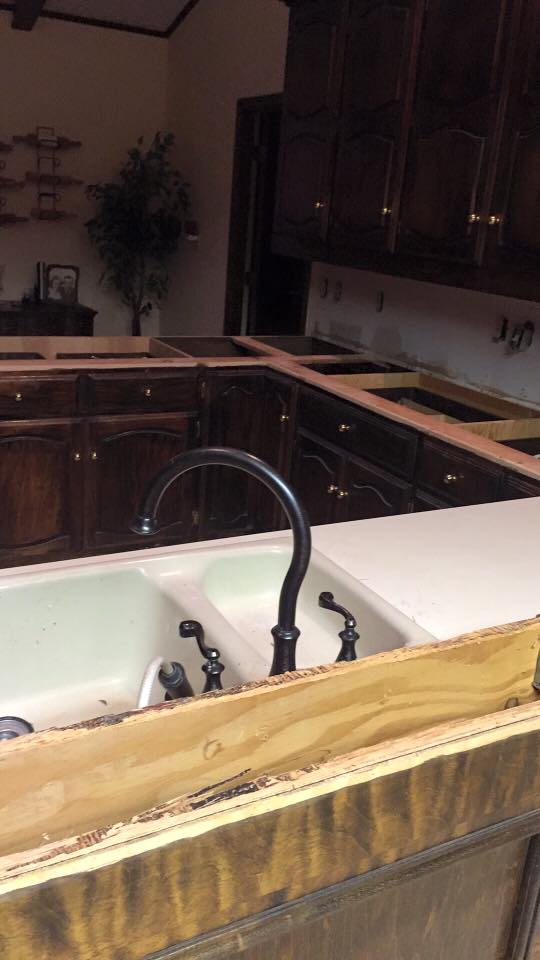
The counter tops (the entire counter top) had to also be removed because we decided to install granite. Again…without damaging the cabinets. I think a complete demo must be easier to accomplish than tip toeing around cabinets you want to save while brutishly man-handling the counter tops. I am cheap. We just needed to be careful and save the cabinets.
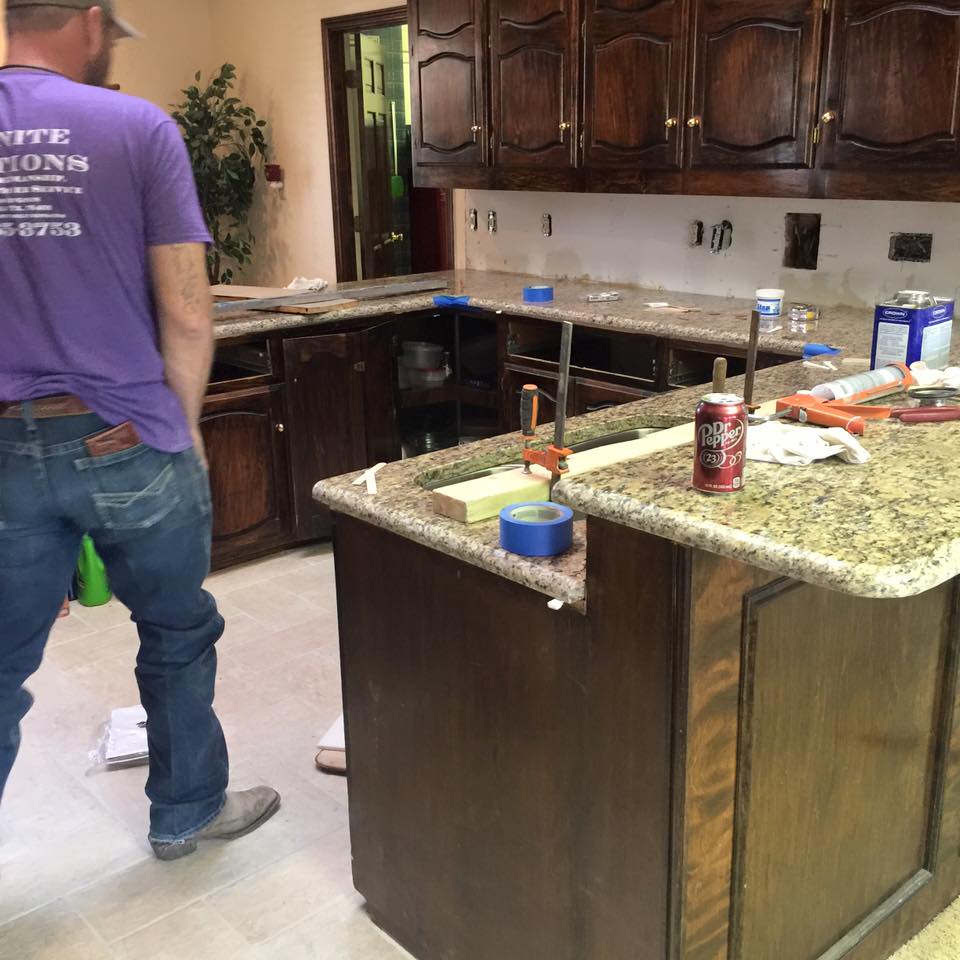
The granite guys were the best I have ever worked with. I have never been so pleased with the quality of product, process, or work ethic shown by Granite Solutions in Stephenville, Texas. Everything was perfect. Gushing is one thing. How about I just let you look for yourself?
The Finished Product
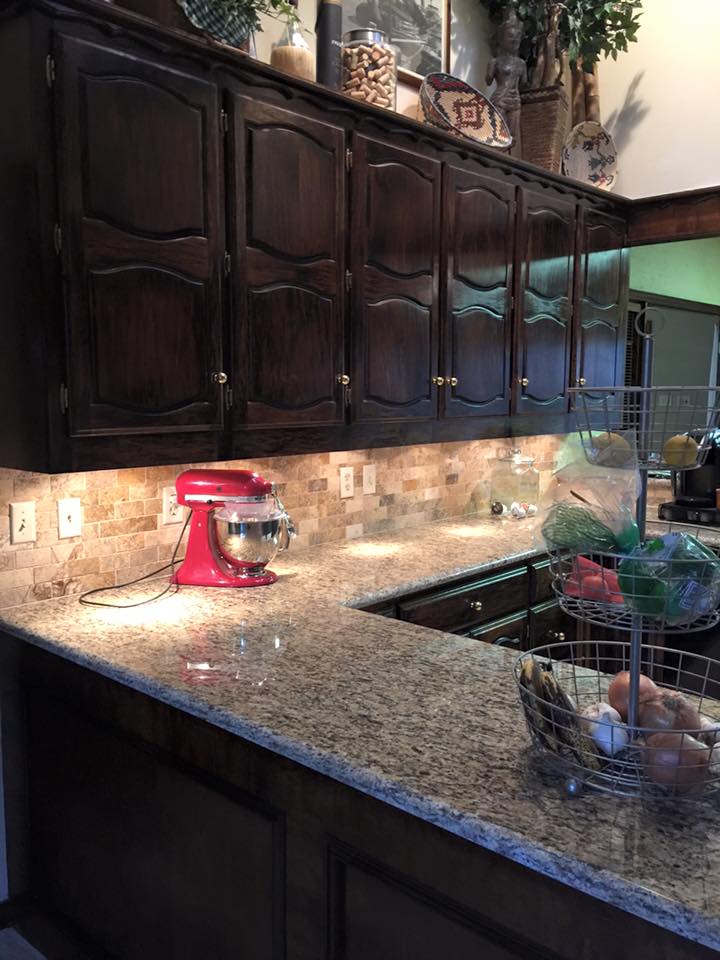
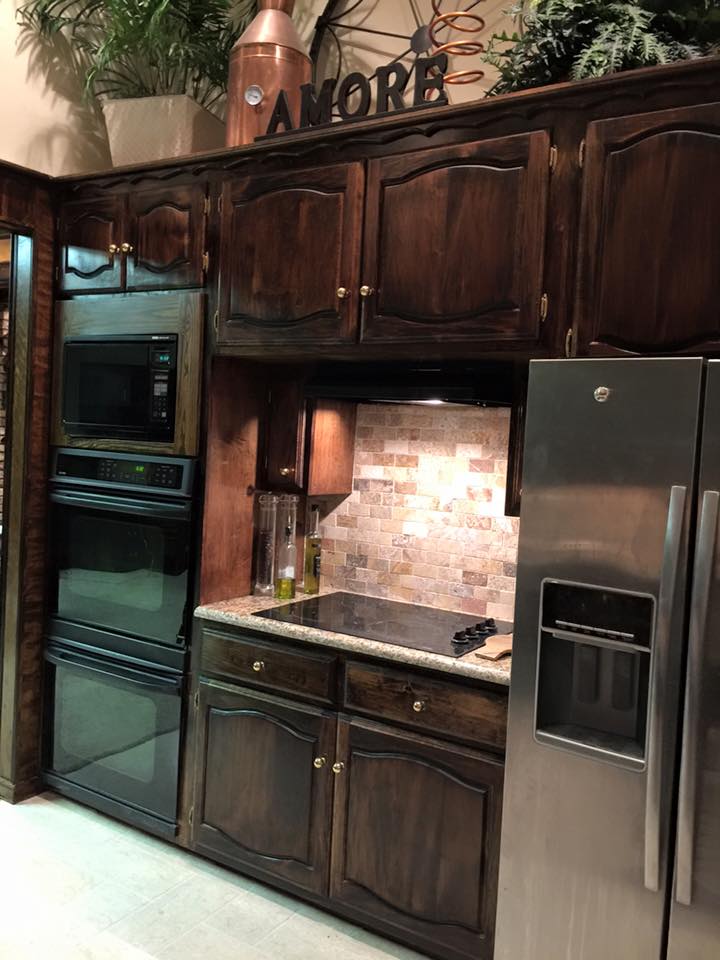
In addition to the new tile, wall paper removal and new wall finish, counter top and back splash, we installed under the counter lighting that really made a huge difference in the work areas. The ceiling is very high and the light just didn’t illuminate the space in the evenings. This was especially true in the alcove where the cooktop is located. The lighting helped to show off the back splash as well.
One Comment
Madeleine Lively
Love your work, your brutal straightforward honesty, your decisions and results. And your writing! Brava!!