Five Cheeses for the Beginning Cheese Maker
Plans Are Like Swiss Cheese…
Some have holes in them. Certainly, my cheese making journey had plenty of holes. If you want to know how many holes, check out this blog post. If I were going to begin the cheese journey again, I think I would focus on making the soft cheeses that are ready in a week or two and leave the aged cheeses to the professionals. And yes, there would be lots of my favorites that would be left off my cheese making list. However, there are several soft cheeses that will keep us satisfied for a lifetime. Here are our top five cheeses that are perfect for a beginning cheese maker and will please even the most refined pallets.
Mozzarella
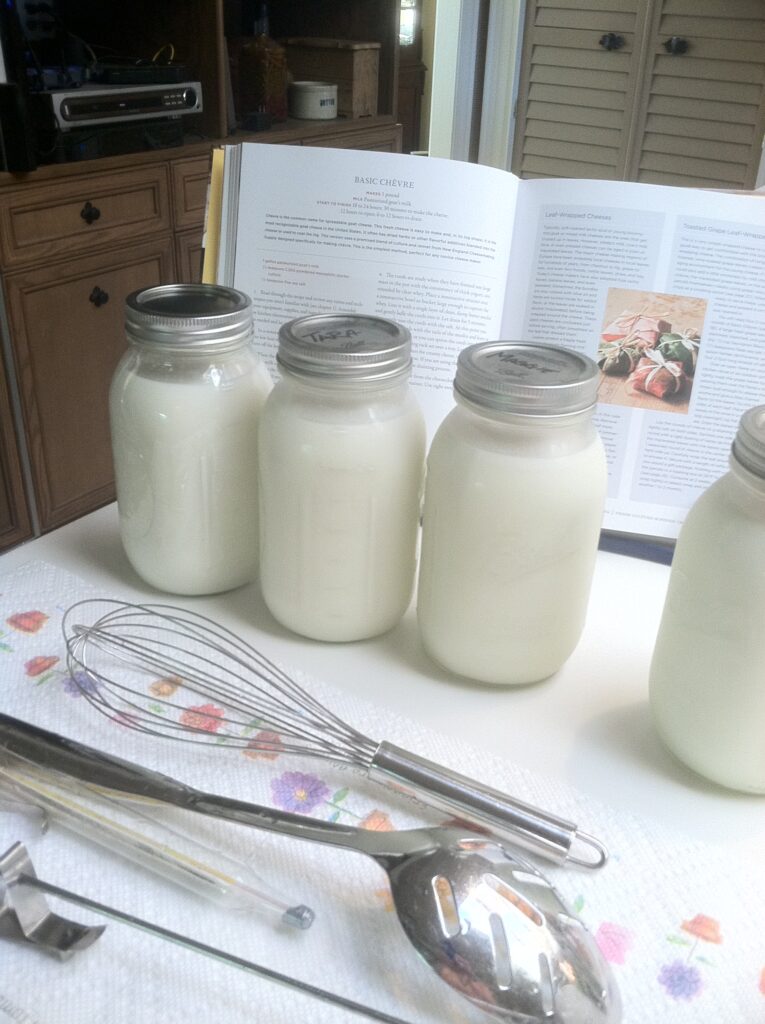
The first of our five cheeses for beginning cheese makers is a microwave mozzarella. Hands down, this is where everyone should start when they want to make cheese. From the grandmother who wants something fun to do during the summer when the kids visit to the cook who thinks they are ready to REALLY start making cheese. The 30 minute mozzarella is the best entry into cheese making I have found. The kit contains everything you will need except for the gallon of milk, a large pot, a large microwave safe bowl, and a microwave.

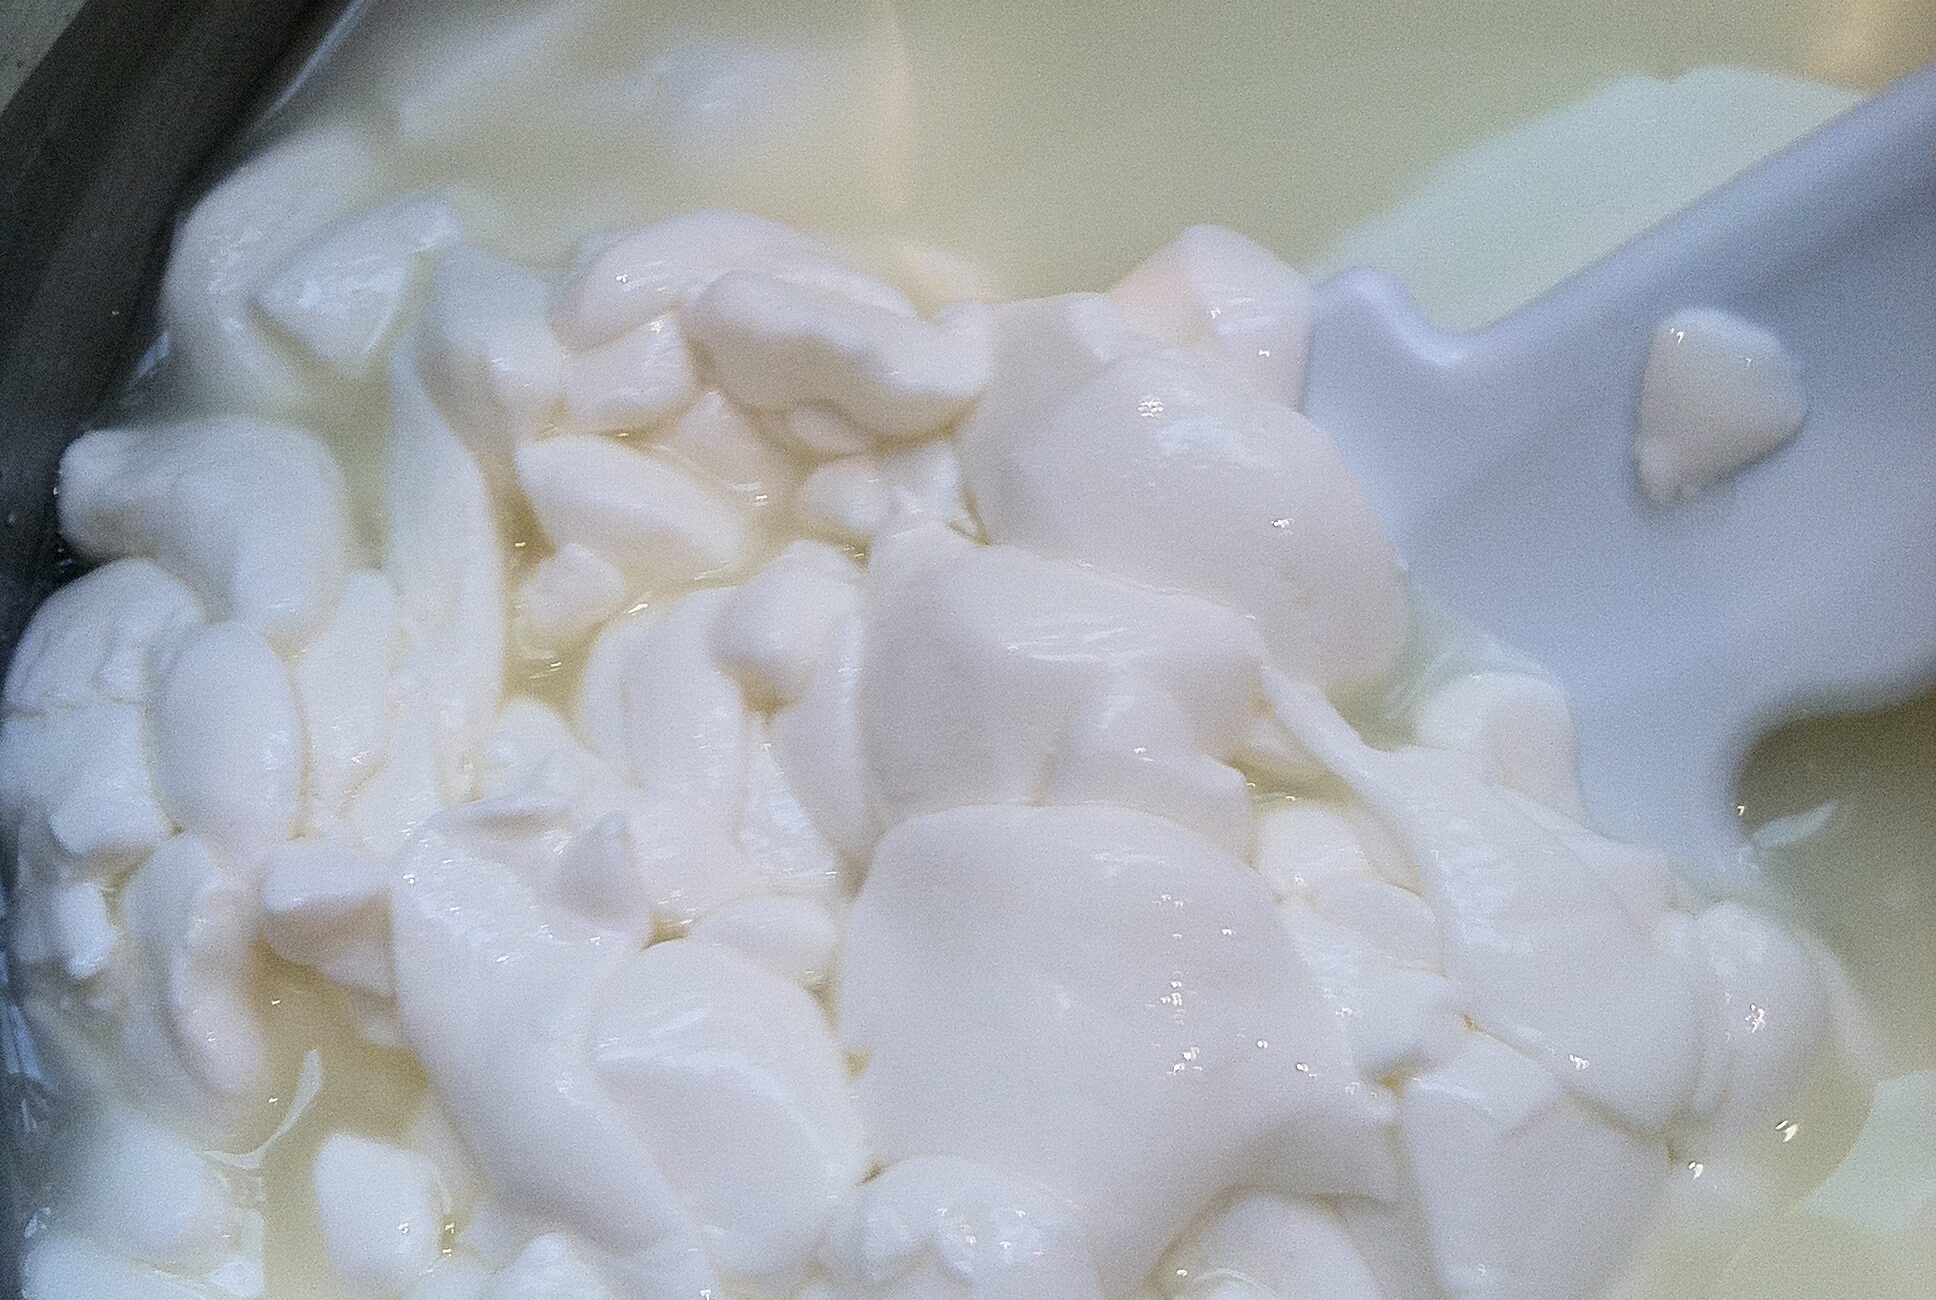
The milk is heated. Rennet is added. Once the curds separate from the whey, you scoop them out and begin to heat them, squeezing out more of the whey as you go. When the curds are up to temperature, they become glossy and impossibly elastic. This yields about a pound of mozzarella cheese.
The Lottery Winner
Have you ever won the lottery? I haven’t, but when this book arrived from Amazon, I felt as if I had won the cheese making lottery. Every recipe sounds more delicious than the last. I can honestly tell you that our favorite soft cheese recipes were found in Artisan Cheese Making at Home. I still have about 20 or so recipes marked with sticky notes reminding me that I need to get back to cheese making. The final four cheeses for beginning cheese makers come from its pages.

Cabecou
The Cabecou is probably one of the most beautiful soft cheeses you can make. Small rounds are formed and placed in small glass jars. The cheese is covered with olive oil and herbs and left to age for a week. When the cheese is ready, the oil can be used as a dipping sauce for bread. It is the perfect addition to an antipasto as a spread. It also makes a charming hostess gift as it is already neatly packaged up for you.
Lavender Mist Chevre
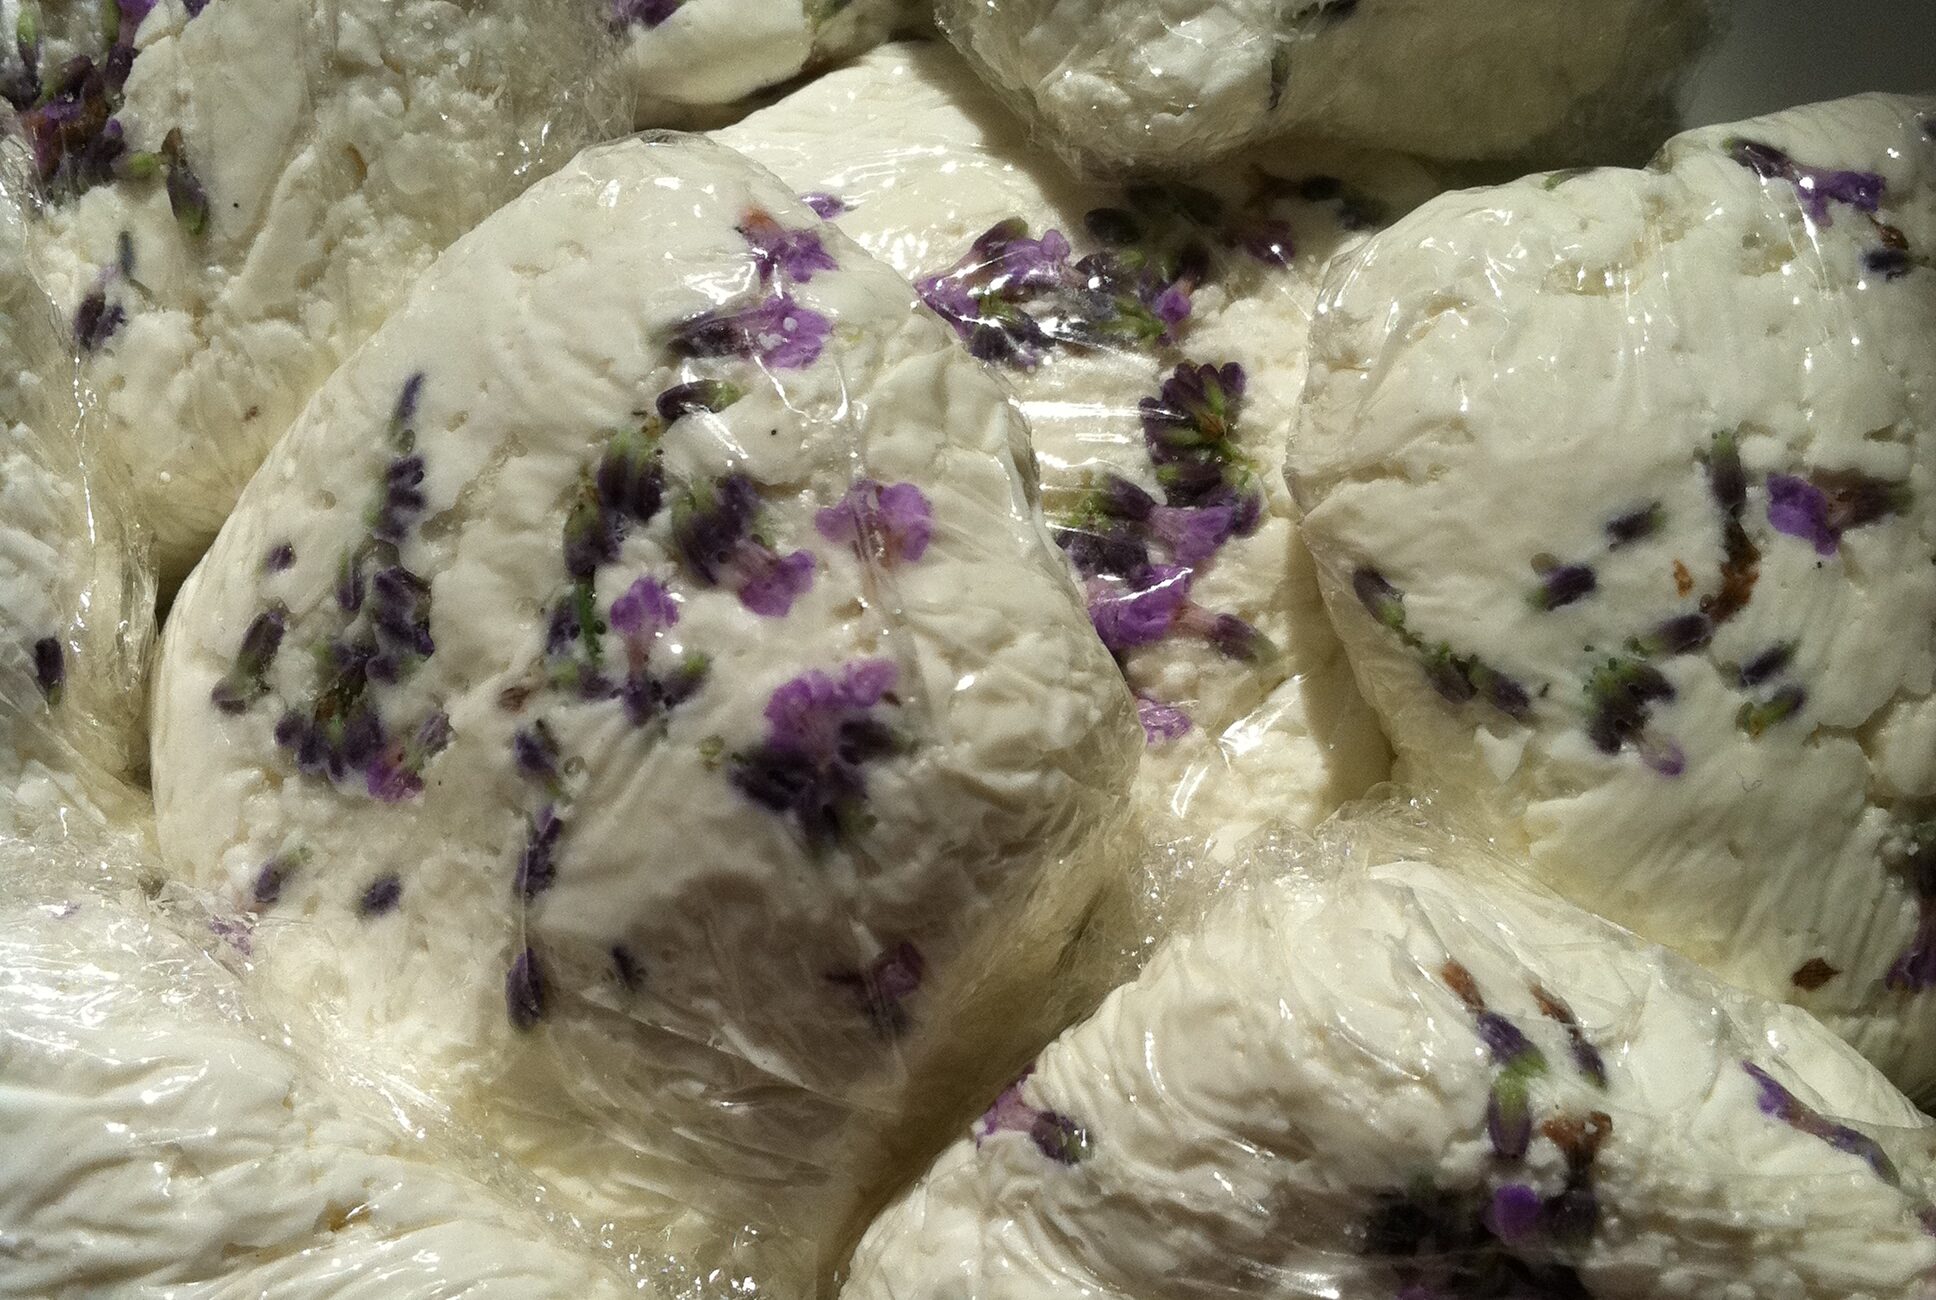 The Lavender Mist Chevre was something I wanted to try, but wondered what adding flowers to cheese would be like. It was yummy, that’s what it was. It was beautiful as well. These small pats of cheese are wrapped in plastic wrap and stored in the refrigerator. They are an elegant addition to a table and make thoughtful hostess gifts. They are also so very easy to make.
Feta
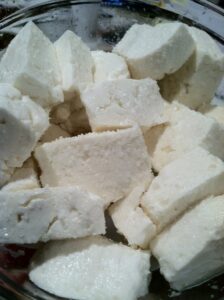 The feta was a very functional cheese to have around. We added it to many, many salads. I don’t know about you, but sometimes I start making things and we don’t eat them. They are cool and they taste good, but they don’t fit into how we eat. I mentioned this in the bread making blog. Love the bread, but four loaves were too many and went to waste.
I hate that I do this. I make jam and it sits on the shelf. We plant tomatoes and they die horrible deaths on the kitchen counter. It is important to me that I make fresh foods, but it is a waste when they aren’t eaten. The feta was always used. From being crumbled on a salad (my original intent) or eaten as a happy bite of food by our feta-loving son, John, we never had to throw any of it away. Yay!
Goat Cheese
 The same was true for the goat cheese. A plain log of goat cheese was instantly useful as it could be spread on homemade bread or paired with fresh figs for a delicious snack. This particular batch (left) had been infused with a spring of rosemary. We like it with some white truffle oil spritzed on it. It pairs well with fresh figs and other herbs.
What I Learned…
 These four soft cheeses are amazing because they required no crazy cheese acrobatics. So far, I have attempted 11 different types of aged cheeses. We went all out and even bought a wine refrigerator for the process (that didn’t solve our problems). For six months, I was taking care of a nursery of newborn babies. I rotated them every other day. I dunked them in a brine solution on the off days. Some cheeses required a set temperature and humidity level or the mold wouldn’t grow properly and I, unfortunately, couldn’t control humidity.
No, no, no. It was just too much work and each cheese needed something different. It was labor intensive and just crazy. I had a clipboard to keep track of it all. After all the work, there were questionable results. I mean, who wants to tend to a wheel of cheese for six months and it end up looking like the picture to the left?
The soft cheeses, however, were ideal. They were ready within a week. I aged the cheeses in the refrigerator with no special humidity requirements. Beyond the original preparation, they sat quietly waiting to come of age. We got along very, very well.